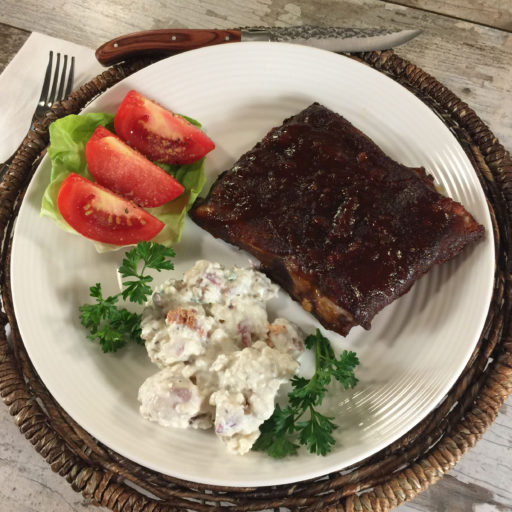
When we think of think of the sort of home cooking that that is emblematic of wholesome American traditions, we often think of apple pie. But, I would also suggest fall-off-the-bone, simultaneously sweet and sour, sumptuously moist and enticingly smoky pork ribs. This technique (sous vide) consistently produces the most amazing pork ribs I have ever (I mean ever!) had.
By the way, I have not lost my way… I know I promised to deliver fast, easy, healthy and inexpensive recipes, and this may not seem to fit that bill. But on occasion, I also want to provide inspiration, and sous vide cooking produces truly amazing results. I also promised recipes that you will be proud to present at the table, and this certainly fits that bill.
Previously limited to the professional cooks, sous vide (pronounced sue-veed), which means “under vacuum” in French, refers to the process of vacuum-sealing food in a bag, then cooking it to a very precise temperature in a water bath. This technique produces results that are impossible to achieve through any other cooking method.
High-end restaurants have been using sous vide cooking for years because it enables them to cook food to the exact level of doneness desired, every time. This technique has recently become popular for home cooks with the availability of affordable and easy-to-use sous vide precision cooking equipment like the Annova Sous Vide Precision Cooker.
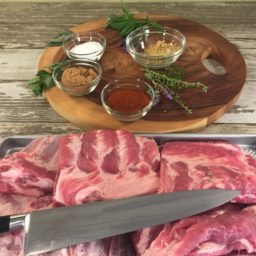
There are three main elements to this recipe, the rub, the ribs and the sauce.
For the Spice (Dry) Rub:
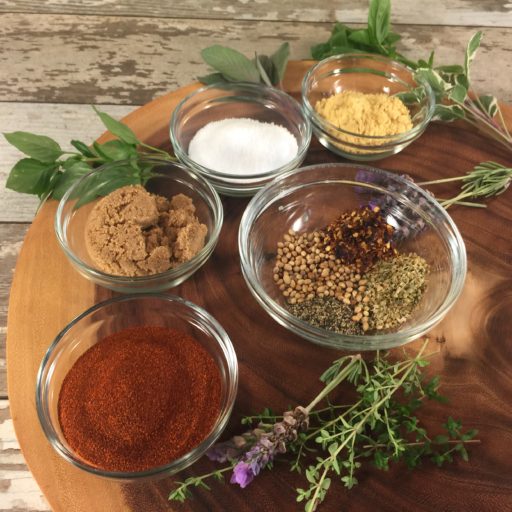
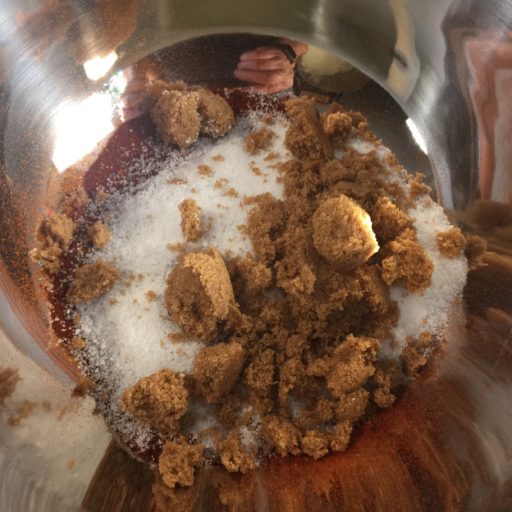
Working in batches, combine the paprika, brown sugar, salt, mustard seed, black pepper, garlic powder, oregano, coriander seed, and red pepper flakes in a spice grinder and reduce to a fine powder.
Spice Grinder: Don’t be put off by this. I use a small Krups coffee grinder for spices including whole dried chilis. This was not a big expense for me because I merely repurposed a coffee grinder I was no longer using and had packed away. Another approach is to use a mortar and pestle. And finally, you could use ground coriander and merely chops the pepper flakes to the best of your ability.

Prepare the Ribs:

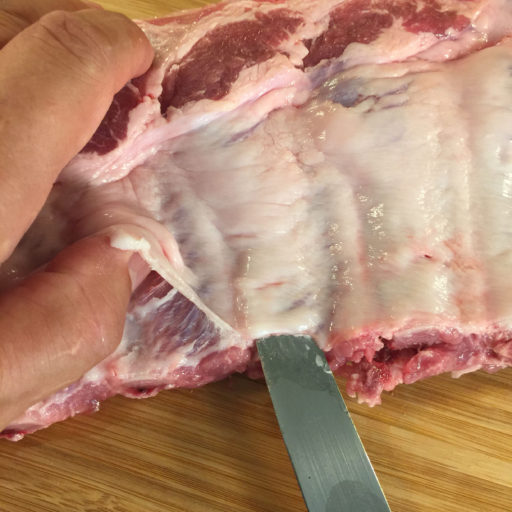
Remove the papery membrane on the back of the ribs, by prying the membrane up off the bone with a blunt table/butter knife, then, using a paper towel or kitchen towel to grip it and pulling it away in one piece.
Divide each rack of ribs into three to four portions with three to four ribs each by cutting through the meat in between the ribs. Rub ribs generously on all sides with the remaining spice rub mixture. (Set aside 6 tablespoons spice rub if to reapply to the ribs when then are being finished and to add to the sauce).

I apply the rub in large mixing bowl with the excess from one rib falling onto the ribs in the bowl below. This seems to be the fastest and easiest method.

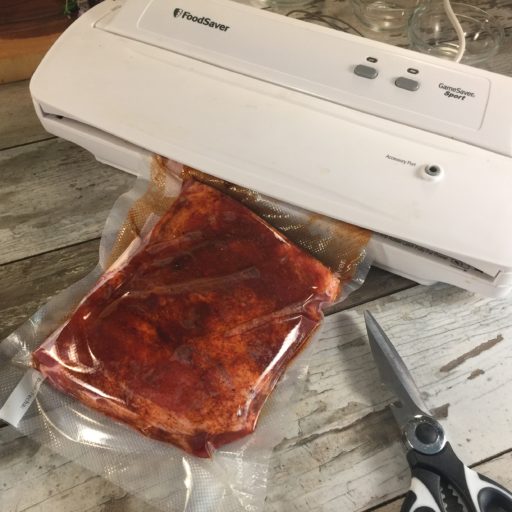
Place individual portions of rubbed ribs in vacuum bags. It is best to fold over the top of each bag while you add the ribs so that no rub or pork juices get on the edges of the bags, which can weaken the seal. This can be a little awkward. What works for me is to leave the bag with the vacuum sealer closed, so it like there is a third hand holding the bag in place. I hold the top of the back and pull it slightly taught and vertical. I then use kitchen tongs on the entire length of the portion of ribs and this seems to make it pretty easy to cleaning insert the ribs into the bag. I add ½ teaspoon of the dry rub and 4 drops (about 1/8 teaspoon) liquid smoke to each bag.
Seal the bags, transfer to refrigerator, and let rest for 4 to 12 hours.
It can be challenging to not get something on the edge of the bag where it will be sealed. When this happens, I wipe the inside edges before sealing and after inspecting the seal, I may seal again, just ¼ inch further towards the opening.
When Ready to Cook:
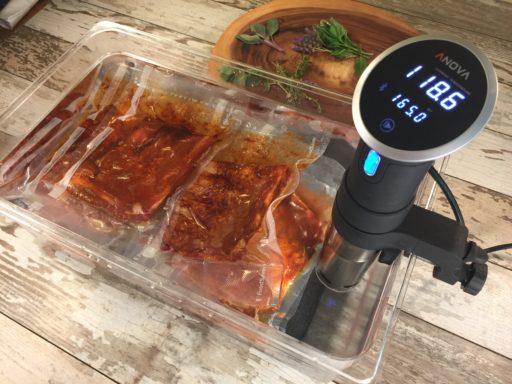
Set your precision cooker to 145 ºF for extra-meaty ribs or 165 ºF for more tender fall-off-the-bone ribs.

Add ribs to the water bath and cover it with a lid, aluminum foil, or ping pong balls (this retains heat and minimizes evaporation). When I am cooking something smaller, like a few filet mignon or boneless/skinless chicken breasts, I use a deep soup pot and a couple of spring-loaded clips to hold the packets in place and fully submerged. When I first started cooking larger recipes such as 10 lbs. of ribs, I acquired a large food grade container with a lid that was specifically designed for sous vide.
Cook for 12-24 hours at 165 ºF (or 36 hours at 145 ºF). I prefer the ribs cooked at 165 ºF so I start them cooking in the evening the day before I am going to serve them. However, if not immediately finishing the ribs, then transfer cooked ribs to a large bowl of water filled with ice to chill thoroughly. Ribs can be stored in the refrigerator at this stage for up to 5 days before finishing.
I find that the ribs can give off a little gas and the individual vacuum packages may start to float. If this occurs, I simple rotate them every 6-8 hours to ensure that they were all fully submerged for a sufficient amount of time.
To Finish Dry-Style in the Oven:

Remove ribs from vacuum bags and carefully pat dry with paper towels.
Rub with remaining 3 tablespoons spice rub. Adjust oven racks to upper and lower-middle positions and preheat oven to 300 ºF. Line 2 rimmed baking sheets with aluminum foil and place a wire rack in each. Divide ribs evenly on racks, facing up. Transfer ribs to oven and cook until a crusty bark has formed, about 40 minutes. Serve.
For the Sauce (if using):
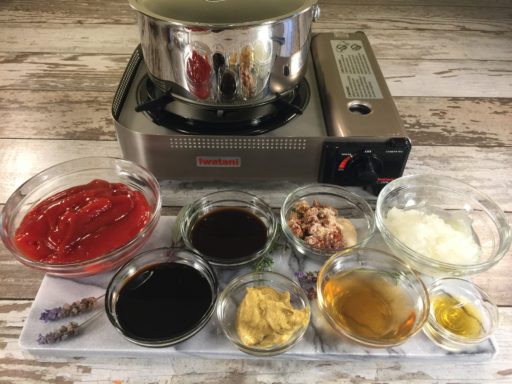
Combine 3 tablespoons spice rub, grated onion, ketchup, mustard, molasses, Worcestershire sauce, vinegar, and liquid smoke in a medium saucepan and whisk to combine.

Bring to a bare simmer and cook until reduced and thickened, about 20-25 minutes. Set aside.

To Finish Sauced Ribs in the Oven:

Adjust oven racks to upper and lower-middle positions and preheat oven to 300 ºF. Line 2 rimmed baking sheets with aluminum foil or non-stick silicon mats.
Remove ribs from vacuum bags, divide in approximately equal groups and place ribs mats or foil, facing up. Apply the remaining 3 tablespoons of rubs to the ribs. Transfer ribs to oven and cook until surface is sizzling and ribs are heated through, about 20 minutes. Brush ribs with sauce and return to oven for 10 minutes. Remove from oven, brush with another layer of sauce, and return to oven until sauce is dried and sticky, about 10 minutes longer. Remove ribs from oven, paint with one last layer of sauce, and serve, passing extra sauce at the table.
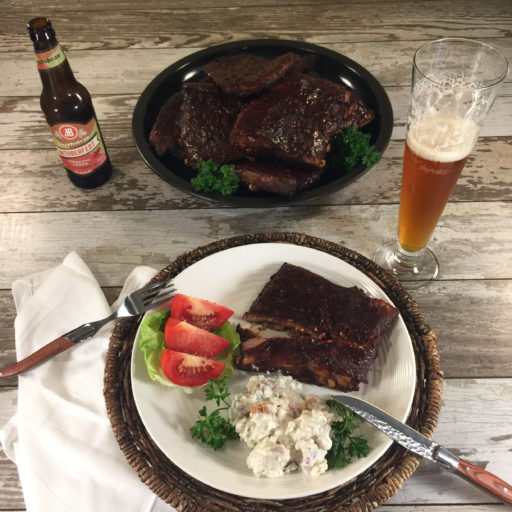
Serve with traditional side dishes like potato salad and/or coleslaw.
- 1/3 cup paprika
- 1/3 cup dark brown sugar
- 1/4 cup kosher salt
- 2 tablespoons whole yellow mustard seed or powder if that is what you have
- 1 teaspoon freshly ground black pepper
- 2 tablespoons granulated garlic powder
- 1 tablespoon dried oregano
- 1 tablespoon whole coriander seed or ground if that is what you have
- 1 teaspoon red pepper flakes
- 3 tablespoons of the dry rub
- 1 medium yellow onion grated on the large holes of a box grater
- 1 1/2 cups ketchup
- 2 tablespoons spicy brown mustard
- 1/3 cup dark molasses
- 1/4 cup Worcestershire sauce
- 1/4 cup apple cider vinegar
- 3/4 teaspoon Wright’s or Colgin Liquid Hickory Smoke
- 2-3 whole racks St. Louis-cut pork ribs 7-10 lbs
- About ¾ - 1 teaspoon Wright’s or Colgin liquid hickory smoke
-
Working in batches, combine the paprika, brown sugar, salt, mustard seed, black pepper, garlic powder, oregano, coriander seed, and red pepper flakes in a spice grinder and reduce to a fine powder.
-
Remove the papery membrane on the back of the ribs, using a paper towel or kitchen towel to grip it and pulling it away in one piece. Divide each rack of ribs into three to four portions with three to four ribs each by cutting through the meat in between the ribs. Rub ribs generously on all sides with the remaining spice rub mixture. (Set aside 6 tablespoons spice rub).
-
Place individual portions of rubbed ribs in vacuum bags. (Fold over the top of each bag while you add the ribs so that no rub or pork juices get on the edges of the bags, which can weaken the seal.) Add 4 drops (about 1/8 teaspoon) liquid smoke to each bag. Seal the bags, transfer to refrigerator, and let rest for 4 to 12 hours.
-
Set your precision cooker to 145 °F for meaty ribs or 165 °F for more tender ribs.
-
Add ribs to the water bath and cover it with a lid, aluminum foil, or ping pong balls (this retains heat and minimizes evaporation). Cook for 12-24 hours at 165 °F. Transfer cooked ribs to a large bowl of water filled with ice to chill thoroughly. Ribs can be stored in the refrigerator at this stage for up to 5 days before finishing.
-
Remove ribs from vacuum bags and carefully pat dry with paper towels. Rub with remaining 3 tablespoons spice rub. Adjust oven racks to upper and lower-middle positions and preheat oven to 300 °F. Line 2 rimmed baking sheets with aluminum foil or silicon cooking mats. Divide ribs evenly on racks, facing up. Transfer ribs to oven and cook until a crusty bark has formed, about 40 minutes. Serve.
-
Combine 3 tablespoons spice rub, grated onion, ketchup, mustard, molasses, Worcestershire sauce, vinegar, and liquid smoke in a medium saucepan and whisk to combine. Bring to a bare simmer and cook until reduced and thickened, about 20-25 minutes. Set aside.
-
Remove ribs from vacuum bags and carefully pat dry with paper towels. Adjust oven racks to upper and lower-middle positions and preheat oven to 300 °F. Line 2 rimmed baking sheets with aluminum foil or silicon cooking mats. Divide ribs evenly on racks, facing up. Liberally sprinkle ribs with ½ the remaining dry rub (about 3 tablespoons). Transfer ribs to oven and cook until surface is sizzling and ribs are heated through, about 20 minutes. Brush ribs with sauce and return to oven for 10 minutes. Remove from oven, brush with another layer of sauce, and return to oven until sauce is dried and sticky, about 10 minutes longer. Remove ribs from oven, paint with one last layer of sauce, and serve, passing extra sauce at the table.
Wine and Beer Pairing:
Ribs and beer seem like a natural paring. Here are some pairing recommendations for your consideration. Roasted-malt like the Belgian Dubbel and DFH Brown, New Belgium Fat Tire, or perhaps a ‘roasty’ imperial stout like Alesmith Speedway, FBS, Olde Hickory Imperial Stout, Ten Fidy. A lot of people recommend Rauchbiers with a distinctive smoke flavor imparted by using malted barley dried over an open flame
Cost:
This can be a very reasonable meal costing $2-3 per plate plus your side dishes. I divide each of three ribs into 3 sections (yielding 9 sections) for cooking, but these sections can be a little large so I tend to get closer to 12 servings.
Time and Effort:
Ok, this meal takes some effort, at the beginning and end. But it also produces enough meat for multiple meals, lunches, and snacks. I still find it well worth the effort, but I also admit to almost always preparing this on the weekends, though it is possible to prepare over two weeknights.
Alex Approved:
This recipe is approved by Alex, but then is fits nicely into his list of approved foods already: meat and BBQ sauce.
Leftovers:
Ribs make great leftovers and when I make them, I make plenty (including sauce) so we can have them for lunch and another dinner later in the week. They keep very well stored in the fridge using Gladware.
Health:
If you are watching your saturated fat, sodium or cholesterol intake, then you probably should skip this meal altogether, and if you are health conscious in general without any specific dietary regimen, then I would still suggest this meal be consumed infrequently, but everyone needs to binge on occasion, and these ribs are worth it.
Alex Approved:
This recipe is approved by Alex, but then is fits nicely into his list of approved foods already: meat and BBQ sauce.